This jacket has a fascinating color and elegant straight cut. It has been made in seed stitch, a reversible and easy stitch. It is also very fun to crochet this garment; you start at the neck and finish wherever you want.
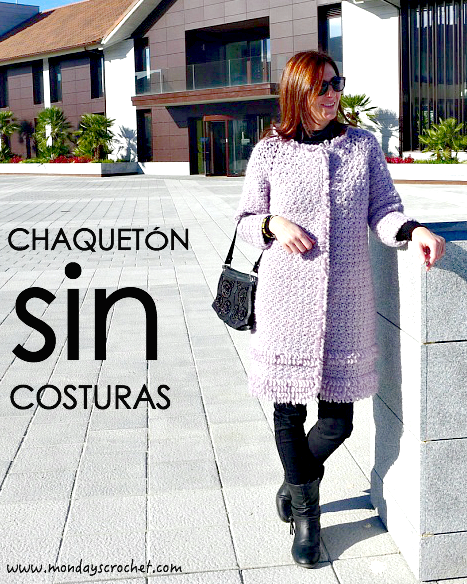
TUTORIAL DE CHAQUETÓN SIN COSTURAS PARA LA TALLA 40 / TOP DOWN THREE-QUARTER-LENGTH JACKET SIZE 40
GRADO DE DIFICULTAD
Avanzado
MATERIALES
8 ovillos de 100 gr de lana para tejer con aguja número 7
Agujas número 9 y 7
Marcadores
Aguja lanera para rematar
4 automáticos transparentes de 22 mm
Hilo de color lila para coser los automáticos
PUNTOS DE CROCHET UTILIZADOS
Cadeneta (c.a.d.)
Punto corredizo (p.c.)
Punto bajo (p.b.)
Punto alto (p.a.)
Punto de arroz (p.a., p.b.)
Punto bucle (buc.)
Punto cangrejo de punto bajo (p.can.pb.)
DIFFICULTY
Advance
MATERIALS
8 balls of 100 gr of wool for hook number 7
Hooks 9 and 7
Markers
Wool needle
4 transparent snap fasteners of 22 mm
Lilac thread to sew the snap fasteners
CROCHET STITCHES
Chain (ch)
Slip Stitch (sl st)
Single crochet (sc)
Double crochet (dc)
Seed stitch (sc dc)
Loop stitch
Crab stitch in single crochet
DESCRIPCIÓN DEL PUNTO DE ARROZ. REVERSIBLE / DESCRIPTION OF SEED STITCH. REVERSIBLE
La principal característica de este sencillo punto es su reversibilidad. Consiste en tejer puntos bajos y puntos altos consecutivamente y en la vuelta del revés, tejer puntos altos sobre los puntos bajos y puntos bajos sobre los altos. El resultado te sorprenderá.
The principal characteristic of this simple stitch is that its reversible. It consists in making single crochet and double crochet and the opposite in the next row. The result will surprise you .

En el siguiente vídeo podéis ver cómo se teje el punto de arroz.
MEDIR LA MUESTRA / MEASURING THE SAMPLE
Hemos tejido una muestra con el punto y la lana que vamos a utilizar. Para una muestra de 10 puntos hemos obtenido 11 cm.
Si no sabéis hacer esta regla de tres podéis consultar el Apartado a CÁLCULO DE PUNTOS INICIALES. MEDIR UNA MUESTRA de la CLASE 6 de nuestra ESCUELA DE CROCHET.
Nuestro contorno de cuello mide 53 cm. Por tanto, tenemos que hacer 48 c.a.d. en la vuelta inicial. Queremos que solape en el delantero derecho, haremos 2 c.a.d. más. En total 50 c.a.d.
We made a sample with the stitch and wool that we are going to use. In this sample, 10 stitches equaled 11 cm.
If you have any problem with this rule visit CLASS 6 – “CALCULATE THE AMOUNT OF CHAINS. MEASURING A SAMPLE”.
The outline of our collar measures 53 cm. We have to do 48 ch in the initial row. We want that to overlap in the right front, therefore we will add 2 more ch, 50 ch in total.
DIVISIÓN DE LAS PARTES DEL CHAQUETÓN / DIVISION OF THE COLLAR
Dividimos los puntos de la vuelta inicial en 6 partes: delantero derecho, hombro derecho, espalda derecha, espalda izquierda, hombro izquierdo y delantero izquierdo.
Divide the chains of the foundation row in 6 sections: rigth front, right shoulder, right back, left front, left shoulder, left back.

Si tenemos 48 c.a.d. entre 6 partes, obtenemos 8 c.a.d.
If we divide 48 ch between 6 parts, we obtain 8 ch in each part.
CUERPO DEL CHAQUETÓN / BODY OF THE JACKET
VUELTA INICIAL: Tejemos con aguja número 9 el contorno donde queremos que empiece nuestra chaqueta de 48 c.a.d. y 2 de solape delantero. En total 50 c.a.d.
Cambiar a la aguja del número 7 para tejer el resto del chaquetón.
FOUNDATION ROW: With hook number 9 make 50 ch.
Change to hook number 7 to make the rest of the jacket.
VUELTA 1 Derecho : 1 c.a.d. de subida y 1 p.b. en el mismo punto, punto de arroz en todos los puntos (p.a., p.b.) hasta completar 50 puntos.
Nuestro chaquetón tiene un dibujo de punto de arroz, múltiplo de 2 puntos, por lo que no podemos aumentar en los p.a. Esta es la división que hemos hecho:
ROW 1 right side : 1 ch to start the row and 1 sc in the same ch, send stitch for the rest of the ch 50 ch in total.
The Seed stitch needs a multiple of 2, therefore we can not increase in the dc. This is the division we made:

Es decir, haremos un aumento de (p.a. c.a.d. p.a.) en los p.b. 9, 15, 33 y 39. Donde hemos situado los marcadores.
That is, we will make an increase of (dc, ch, dc ) in the ch. 9, 15, 33 and 39 where we placed the markers.

VUELTA 2 Revés: 1 c.a.d. de subida y 1 p.b. en el mismo punto, punto de arroz en todos los puntos (p.a., p.b.) hasta el punto con marcador donde tejemos (p.a. 2 c.a.d. p.a.) para aumentar. Hacemos lo mismo en todos los marcadores. En esta vuelta tendremos un total de 54 puntos. Repartidos en 9 en el delantero izquierdo, 7 en los hombros, 19 en la espalda y 12 en el delantero derecho.
VUELTA 3 Derecho: 1 c.a.d. de subida y 1 p.b. en el mismo punto, punto de arroz en todos los puntos (p.a., p.b.) hasta el punto de aumentos de la vuelta anterior donde tejemos (p.a. 2 c.a.d. p.a.) para aumentar. Hacemos lo mismo en todos los aumentos. En esta vuelta tendremos un total de 62 puntos. Repartidos en 10 en el delantero izquierdo, 9 en los hombros, 21 en la espalda y 13 en el delantero derecho.
VUELTA 4 Revés: 1 c.a.d. de subida y 1 p.b. en el mismo punto, punto de arroz en todos los puntos (p.a., p.b.) hasta el punto de aumentos de la vuelta anterior donde tejemos (p.a. 2 c.a.d. p.a.) para aumentar. Hacemos lo mismo en todos los aumentos. En esta vuelta tendremos un total de 70 puntos. Repartidos en 11 en el delantero izquierdo, 11 en los hombros, 23 en la espalda y 14 en el delantero derecho.

ROW 2 wrong side: 1 ch to start the row and 1 sc in the same stitch, seed stitch in every stitch (dc, sc) until the marker where we make (dc, 2 ch, dc). Do the same for all markers. 54 stitches in total. We now have 9 in the left front, 7 in the shoulders, 19 in the back and 12 in the right front.
ROW 3 right side: 1 ch to start the row and 1 sc in the same stitch, seed stitch in every stitch (dc sc) when we reach the extra stitch, make (dc, 2 ch, dc). Do the same for all the extras. 62 stitches in total. We now have 10 in the left front, 9 in the shoulders, 21 in the back and 13 in the right front.
ROW 4 wrong side: 1 ch to start the row and 1 sc in the same stitch, seed stitch in every stitch (dc sc) when we reach the extra stitch, make (dc, 2 ch, dc). Do the same for all the extras. 70 stitches in total. We now have 11 in the left front, 11 in the shoulders, 23 in the back and 14 in the right front.

Continuar tejiendo hasta completar la VUELTA 14 del revés. En esta vuelta los puntos de la espalda miden la mitad de nuestro contorno.
Continue working until row 14, inside out. In this row, the stitches of the back measure half of our outline.
En la VUELTA 15 unimos los aumentos de los hombros y continuamos tejiendo el cuerpo del chaquetón.
In ROW 15, join the increases of the shoulders. Continue making the body of the jacket.

VUELTA 15 Derecho: 1 c.a.d. de subida y 1 p.b. en el mismo punto, p.a., p.b. Punto de arroz en todos los puntos hasta los aumentos de la vuelta anterior donde unimos la línea de aumentos delantero y trasero del hombro y continuamos tejiendo la espalda con el punto que nos toque p.b. o p.a. En esta vuelta tendremos un total de 92 puntos. Repartidos en 22 en el delantero izquierdo, 45 en la espalda y 25 en el delantero derecho.
ROW 15: 1 ch to start the row and 1 sc in the same dc, sc. Seed stitch (sc dc) every stitch until the extra stitches of the previous row where we joined the extras front and back of the shoulder making 1 dc. Continue making the back. 92 stitches in total. 22 stitches in the left front, 45 in the back and 25 in the right front.
Vamos a continuar tejiendo el cuerpo de 92 puntos en vueltas del derecho y del revés hasta llegar al largo del chaquetón deseado.
Continue working the body of 92 stitches until reaching the desired length.

VUELTAS 16 a 49: 1 c.a.d. de subida y 1 p.b. en el mismo punto, punto de arroz en todos los puntos (p.a., p.b.). En total de 92 puntos.
ROWS 16 to 49: 1 ch to start the row and 1 sc in the same stitch, seed stitch (sc dc) in every stitch. 92 stitches in total.

DESCRIPCIÓN DE PUNTO BUCLE / LOOP STITCH DESCRIPTION
Este punto se teje por el revés de la prenda. Se trata de un punto especial un poco laborioso, por lo que os recomendamos tejerlo solamente en los bordes de una prenda.
Introducir la aguja por las dos lazadas del punto de la vuelta anterior.
Coger hebra entre los dedos formando un bucle con la longitud deseada e igual en todos los bucles.
Situar la aguja por encima de la hebra del bucle y coger la parte de atrás del mismo.
Sacarla por la lazada del punto.
Echar hebra y cerrar el bucle con un p.b.
This stitch is made on the wrong side of the garment. It is a bit laborious, so we recommend to make it only at the edges of a garment.
Insert a needle through the two loops of the stitch of the previous row.
Take the thread between the fingers forming a loop with the length desired and equal in all loops.
Place the needle above the thread of the loop and take the back part.
Pull it out by the loop of the stitch.
Yarn over and fasten the loop with sc.
En el siguiente vídeo podéis ver este punto.
You can see this stitch in the video below.

VUELTA 50, 52, 58, 60, 62 Y 64 Revés: 1 c.a.d. de subida y 1 p.b. en el mismo punto, 1 p.b. en el siguiente punto, 1 buc. en todos los puntos. Terminar la vuelta con 1 p.b. en los últimos 2 puntos.
ROW 50, 52, 58, 60, 62 and 64 wrong side: 1 ch to start the row and 1 sc in the same stitch, 1 sc in the next stitch, 1 loop in every stitch. Finish the row with 1 sc in the last 2 stitches.

VUELTA 51, 59, 61 Y 63 Derecho: 1 c.a.d. de subida y 1 p.b. en el mismo punto, 1 p.b. en todos los puntos de la vuelta.
ROW 51, 59, 61 and 63 right side: 1 ch to start the row and 1 sc in the same stitch, 1 sc in every stitch of the row.

VUELTAS 53 a 59: 1 c.a.d. de subida y 1 p.b. en el mismo punto, punto de arroz en todos los puntos (p.a., p.b.).
ROWS 53 to 59: 1 ch to start the row and 1 sc in the same stitch, seed stitch (sc dc) in every stitch.
MANGAS DE LONGITUD 42 cm y CONTORNO DEL PUÑO 26 cm / SLEEVES 42 cm LONG and 26 cm OUTLINE OF THE CUFF
Para conseguir que las mangas no tengan costuras comenzamos a tejer en la axila del chaquetón y terminamos cada vuelta con un punto corredizo. Girar la manga para tejer por el derecho o revés de la prenda.
To obtain sleeves without seams, start to work in the underarm and finish each row with a sl st.

VUELTAS IMPARES 15 a 27 Derecho: 1 c.a.d. de subida. Punto de arroz en todos los puntos. Menguar 1 punto dejando sin hacer el punto junto a la c.a.d de subida. Cerrar con 1 p.c. En total 34 puntos en la VUELTA 15 y 24 puntos en la VUELTA 27.
VUELTAS PARES 16 a 26 Revés: 1 c.a.d. de subida. Punto de arroz en todos los puntos. Menguar 1 punto dejando sin hacer el punto junto a la c.a.d de subida. Cerrar con 1 p.c. En total 33 puntos en la VUELTA 16 y 25 puntos en la VUELTA 26.
VUELTAS IMPARES 27 a 31 Derecho: 1 c.a.d. de subida. Punto de arroz en todos los puntos. Cerrar con 1 p.c. En total 24 puntos.
VUELTAS PARES 28 a 32 Revés: 1 c.a.d. de subida. Punto de arroz en todos los puntos. Cerrar con 1 p.c. En total 24 puntos.
VUELTA IMPAR 33 Derecho: 1 c.a.d. de subida. Punto de arroz en todos los puntos. Menguar 1 punto dejando sin hacer el punto junto a la c.a.d de subida. Cerrar con 1 p.c. En total 23 puntos.
VUELTA PAR 34 Revés: 1 c.a.d. de subida. Punto de arroz en todos los puntos. Cerrar con 1 p.c. En total 23 puntos.
VUELTA IMPAR 35 Derecho: 1 c.a.d. de subida. Punto de arroz en todos los puntos. Cerrar con 1 p.c. En total 23 puntos.
VUELTA PAR 36 Derecho: 1 c.a.d. de subida. Punto de arroz en todos los puntos. Menguar 1 punto dejando sin hacer el punto junto a la c.a.d de subida. Cerrar con 1 p.c. En total 22 puntos.
VUELTA IMPAR 37 Derecho: 1 c.a.d. de subida. Punto de arroz en todos los puntos. Cerrar con 1 p.c. En total 22 puntos.
VUELTA PAR 38 Revés: 1 c.a.d. de subida, p.a., p.b. Punto de arroz en todos los puntos. Cerrar con 1 p.c. En total 22 puntos.
VUELTA IMPAR 39 Derecho: 1 c.a.d. de subida, p.a., p.b. Punto de arroz en todos los puntos. Menguar 1 punto dejando sin hacer el punto junto a la c.a.d de subida.Cerrar con 1 p.c. En total 21 puntos.
VUELTA PAR 40 Revés: 1 c.a.d. de subida, p.b., p.a. Punto de arroz en todos los puntos. Cerrar con 1 p.c. En total 21 puntos.
VUELTA IMPAR 41 Derecho: 1 c.a.d. de subida y p.b. en todos los puntos de la vuelta anterior.Cerrar con 1 p.c. En total 21 p.b.
VUELTA PAR 42 Derecho: p.can.pb. en todos los puntos.

EVEN ROWS 16 to 26 wrong side: 1 ch to start the row. Seed stitch in each stitch. Decrease 1 stitch (do not make the stitch at the starting chain) Finish off with 1 sc. 33 stitches in total in ROW 16 and 25 stitches in ROW 26.
ODD ROWS 27 to 31 right side: 1 ch to start the row. Seed stitch in each stitch. Finish off with sl st. 24 stitches in total.
EVEN ROWS 28 to 32 wrong side: 1 ch to start the row. Seed stitch in each stitch. Finish off with sl st. 24 stitches in total.
ODD ROW 33 right side: 1 ch to start the row. Seed stitch in each stitch. 23 stitches in total.
EVEN ROW 34 wrong side: 1 ch to start the row. Seed stitch in each stitch. Finish off with sc, 23 stitches in total.
ODD ROW 35 right side: 1 ch to start the row. Seed stitch in each stitch. Finish off with 1 sl st. 23 stitches in total.
EVEN ROW 36 right side 1 ch to start the row. Seed stitch in each stitch. Decrease 1 stitch (do not make the stitch by the starting chain). 22 stitches in total.
ODD ROW 37 right side 1 ch to start the row. Seed stitch in each stitch. Finish off with 1 sl st. 22 stitches in total.
EVEN ROW 38 wrong side: 1 ch to start the row. Seed stitch in each stitch. Finish off with 1 sl st. 22 stitches in total.
ODD ROW 39 right side: 1 ch to start the row, p.a., p.b. Seed stitch in each stitch. Decrease 1 stitch (do not make the stitch by the starting chain). Finish off with 1 sc. 21 stitches in total.
EVEN ROW 40 wrong side: 1 ch to start the row. Seed stitch in each stitch. Finish off with sl st. 21 stitches in total.
ODD ROW 41 right side: 1 ch to start the row and sc at every stitch of the previous row. Finish off with 1 sl st. 21 stitches in total.
EVEN ROW 42 right side: crab stitch with sc in every stitch.
You can see how to make crab stitch with sc in the video below.
Rematar la manga y esconder la lana con una aguja lanera.
Finish off the sleeve and hide the remaining thread with a wool needle.
TERMINACIÓN O REMATE EN CUELLO Y DELANTEROS / FINISH OFF THE COLLAR AND TWO FRONTS
Para la terminación en el cuello y delantero hemos tejido una vuelta de puntos bajos, otra de bucles y finalmente, una vuelta de cangrejo de punto bajo.

Por último cosemos 4 automáticos transparentes de 22 mm de diámetro separados 15 cm comenzando por el primero en el cuello del chaquetón.

We know it is a laborious project but following step by step this tutorial you will have a wonderful result. Go ahead and crochet!

Fuente: este post proviene de este blog, donde puedes consultar el contenido original.
¿Vulnera este post tus derechos? Pincha aquí.
Creado: