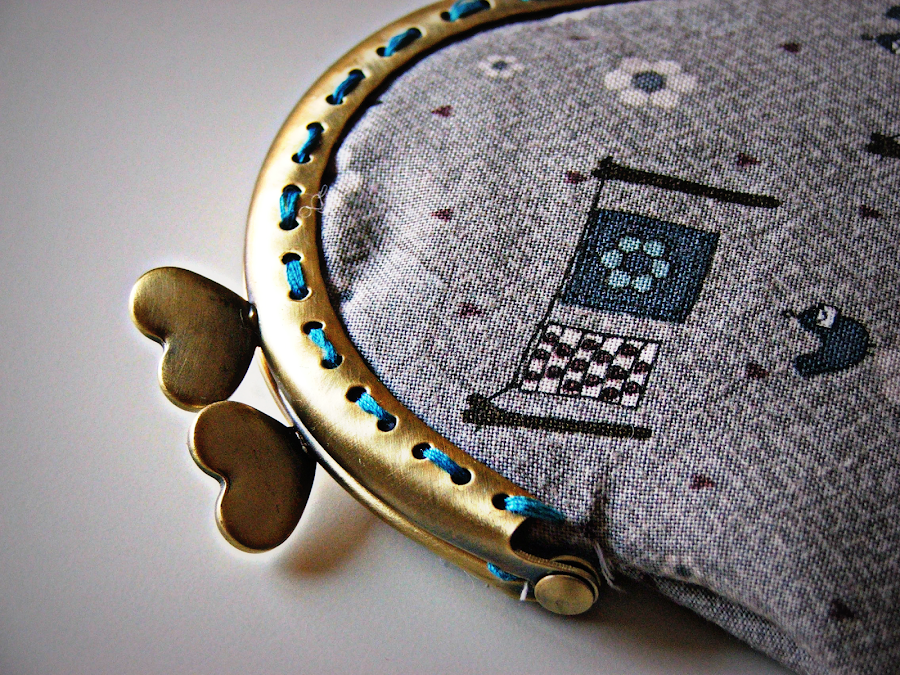
Esta vez he hecho un precioso monedero y viene con tutorial. ¡El monedero es este!
¡Vamos con el TUTORIAL!
Lo primero de todo, comprar los materiales.
En este caso yo he usado:
- Dos trozos de telas diferentes, una para el exterior y otra para el interior.
- Una boquilla de metal para monedero. (Yo esta la he comprado en una tienda que descubrí el otro día, Sweet Sixteen, una monería de tienda).
- Entretela de guata (de la misma medida que las dos telas).
- Un patrón que vamos a diseñar nosotras en papel.
- Tijeras, lápiz, jaboncillos e hilo.
Y ahora... ¡manos a la obra!
Lo primero es diseñar nuestro patrón.
Yo para ello he puesto la boquilla sobre el papel y he dibujado con el lápiz el contorno, y después le he dado la forma que me gustaba para el monedero, dejando 1 centímetro de margen para las costuras.
Lo siguiente que he hecho ha sido pasar el patrón a las telas, dibujándolo con los jaboncillos dos veces en cada tela (la interior, la exterior y la entretela).
Después recortamos los 6 dibujos que hemos hecho en la tela y colocamos las telas de la siguiente forma: Tela interior, entretela, tela exterior con el dibujo hacia fuera, tela exterior con el dibujo hacia dentro, entretela, y tela interior. En la imagen de arriba se ve cómo deben colocarse.
Pasamos la máquina por el borde del monedero, dejando el hueco donde irá la boquilla sin coser. Recortamos la tela que sobra. Le damos la vuelta por el hueco que hemos dejado y por último colocamos la boquilla y la cosemos con el hilo que nos guste.
Espero que os haya gustado mi tutorial. El monedero es muy práctico y fácil de hacer, así que yo os animo a que probéis y me enseñéis los resultados!! Cualquier duda, me dejáis un comentario.
Un besazo y gracias por leerme :)
ENGLISH VERSION!!
New post again!
This time I"ve made a beautiful purse, and also the tutorial!! You can see the purse above or by clicking HERE.
Let"s start with the TUTORIAL!!
First of all, we have to buy the materials (pic above or HERE):
I used:
- Two pieces of two different types of fabric, one for the inside and the other one for the outside of the purse.
- A metal purse clasp (the one that I used I bought in a really nice shop that I discovered the other day, Sweet Sixteen).
- A piece of wadding (same size as the other two pieces of fabric).
- A piece of paper for the purse pattern (that we"ll design ourselves).
- Scissors, pencil, tailor"s chalk and thread.
And now.. let"s get on with it!!
First of all we"ve to design our purse pattern. (Pictures above or click HERE)
I placed the purse clasp on the piece of paper and then drew the outline, and after that I designed the shape of the purse as I wanted to make it. We have to include 1 cm seam allowance in the pattern.
Now trace the pattern onto the fabric using the tailor"s chalk. We have to trace it twice on each piece of fabric (the inside, outside and wadding).
Next step is cutting the 6 pieces (pic HERE), and placing them this way: Inside fabric, wadding, outside fabric facing up, outside fabric facing down, wadding and inside fabric. In the picture above you can see how it should be placed (or click HERE).
Sew the edge of the purse leaving an opening on the bottom, where the clasp is going to be placed, for turning (pic HERE). Turn the purse right side out and put the clasp in its place. Now sew with the thread that you"ve chosen (pic HERE).
I hope you"ve liked my tutorial!! It"s a very practical and easy to make purse, so I encourage you to make your own purses and send me a picture of it please!! If you have any doubts, leave a comment.
Thanks for reading :)
Xx


