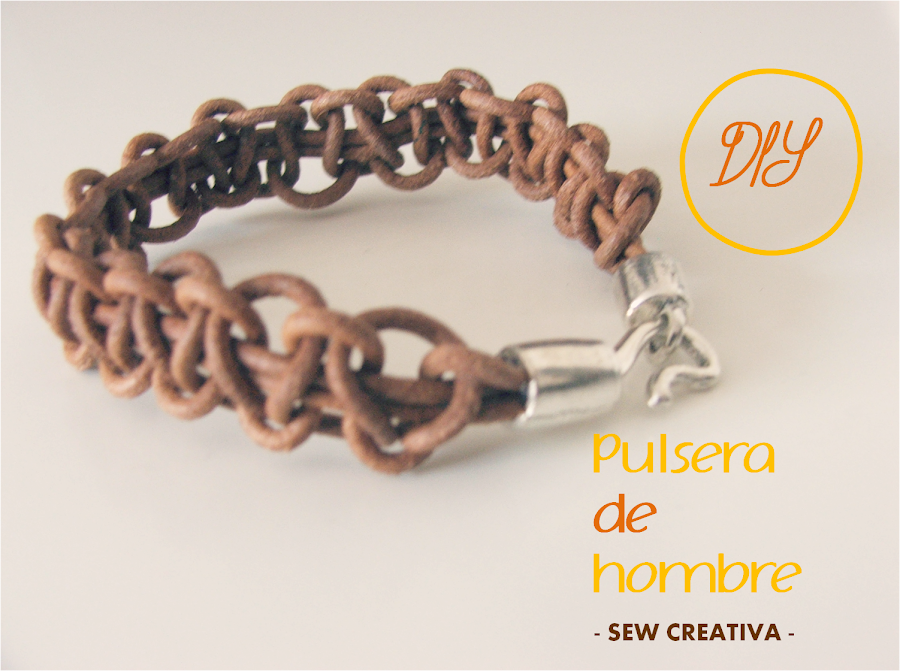
Hoy os traigo un tutorial que me temo os va a encantar!!
Hace unos días subí algunas fotos a mi página de facebook de una pulsera que le hice a mi chico. ¡Y os encantó! Tras ver que varios me pidierais que por favor subiera el tutorial, me he animado.
Además, siempre es complicado encontrar regalos para hombres. Y se avecinan las navidades, así que creo que es una buena opción si queréis regalarle algo a vuestra pareja, padre, abuelo, hermano... ¡Qué se yo!
Y no es que esta pulsera sólo sea para hombre, yo diría más bien que es unisex. En fin, dejo de enrollarme y vamos con el DIY. ¿Estáis listas?
Materiales:
- Cuero (2 trocitos de unos 30 cm. y otro de 1.5 m.)
- Cierre metálico
- Tijeras
- Pegamento
Paso a paso:
¿Recordáis el DIY de pulseras de macramé? Lo tenéis haciéndo click AQUÍ. Realmente la técnica es la misma, pero incluso más sencillo si cabe ya que no tenemos que poner abalorios. Vais a ver.
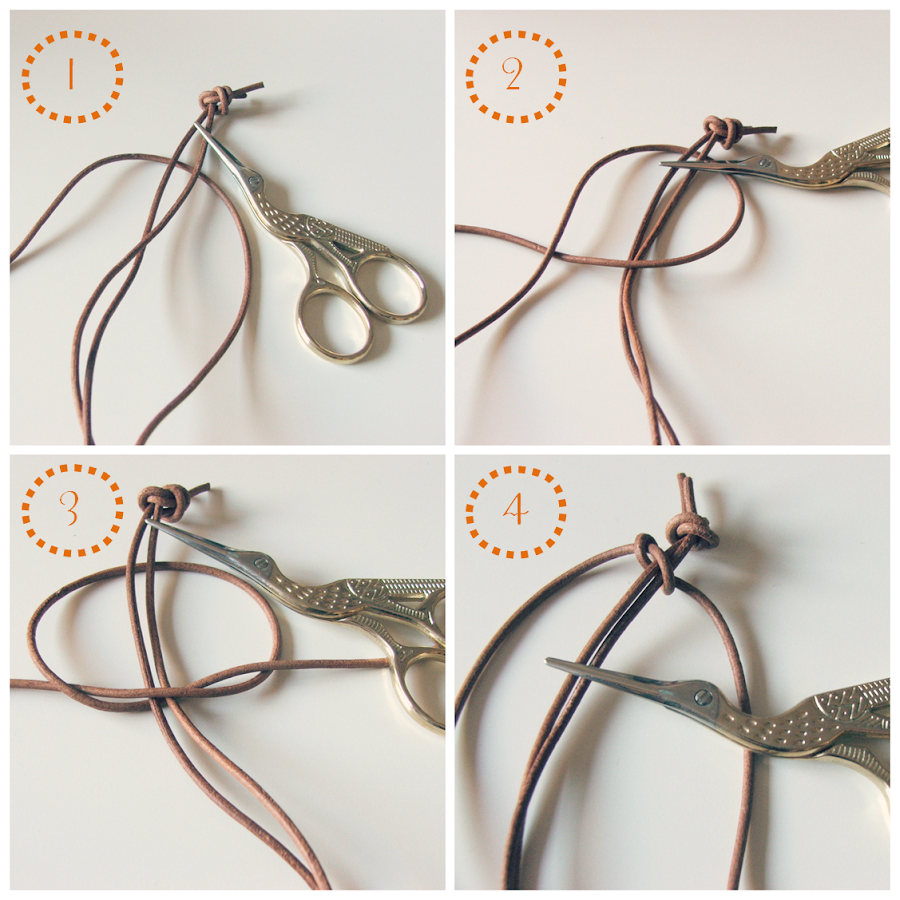
Primero juntamos los dos cordones de 30 centímetros y hacemos un nudo en uno de los extremos para que no se nos mueva.
Después pasamos el cordón largo, el de 1.5 metros, por detrás de los dos cordones anudados, intentando que quede centrado.
Y comenzamos a hacer los nudos de macramé, igual que hicimos en el otro tutorial que ya os expliqué. Os dejo las fotografías, que son muy fáciles de seguir. Y recordad que las explicaciones las tenéis en este otro post.
Una vez tengáis la pulsera del largo que queráis, deshacéis el nudo que habíamos hecho y cortáis los extremos. Pegamos el cierre a los extremos de la pulsera.
Y ya está terminada.
¿Os gusta? ¿Os gusta regalar cosas que habéis hecho a mano o preferís comprarlo?
Un besito y feliz semana.
Marta.
Hi there!!
Today I"ll show you a tutorial that I"m sure you"ll love!
A few days ago I posted on Facebook some pictures of a bracalet that I made for my boyfriend. And everyone loved it! Some of you asked me to post the tutorial, so here it is.
As you know, finding a present for a boy is always very complicated. So as Christmas is coming soon, I thought it would be a good idea to post the DIY in case you wanted to make somthing for your partner, dad, grandad, brother... whoever!
Plus, it"s not only a man"s bracalet, I would say that it"s unisex. Well, I better stop talking and talking and show you how to make it. Are you ready?
Materials:
- Leather cord. (2 pieces of 30 cm. and another one of 1.5 m.)
- A metal closure
- Scissors
- Glue
Step by step:
Do you remember the post in which I showed you how to make macrame bracalets? The techinque is the same one, but even easier as we don"t have to use any beads at all. You"ll see!
So first of all, we put the two 30 cm cords together and we make a knot in one of the sides so that they stay together and don"t move.
After that, we have to put the long cord under the two knoted cords, leaving it in the centre.
And then we just have to make the macrame knots in the same way as we did in the other tutorial. There are some pictures above to guide you, and you can read all the explanations on this other post.
Once you"ve made the bracalet as long as you like, we have to untie the knot we made at the begining, and cut the excess off. Then we paste the metal closure to the ends of the bracalet. And finished!
Do you like it? Do you normally make presents or do you prefer to buy them?
Have a great week!
Xx.
Marta.


