BOLSITA PARA ROPA INTERIOR PARA CHICA CON FORRO (Underwear bag with lining)

Hola chi@s
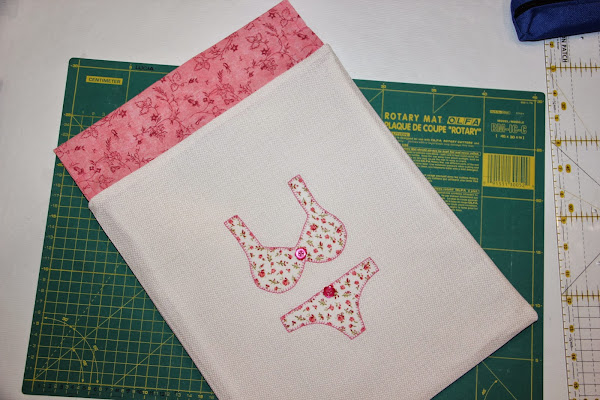
Hoy os traigo un tutorial de como hacer esta bolsita de ropa interior con forro. Ideal para llevar de viaje y también muy adecuada para hacer un bonito y útil regalo.
Hello everyone
Today I bring you all, a tutorial of how to make this underwear bag with lining. Ideal to take with you on holidays or to make a nice and useful present.


Aquí te muestro el paso a paso:


MATERIALES:
- Telas (para el exterior, para el forro, para el dibujo  y para el borde superior de la bolsita).
- Papel termo-adhesivo
- Hilos
- Tabla y cuchilla de corte (opcional)
- Tijeras
- 1,50 m. de cinta de cordón.
MATERIALS:
 - Fabric (for the outside, for the lining, for the picture and for the superior edge of the bag.
 - Double face fusible paper
 - Therad
 - Blade and table
 - Scissors
 - 2 x 75 cm of cord


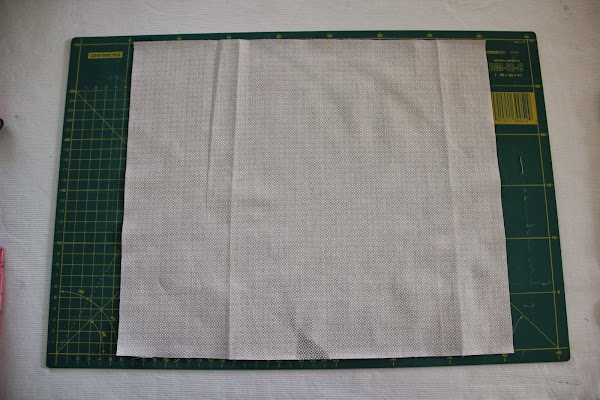
Cortamos dos piezas de 30x35 cm para la tela exterior de la bolsita y otras dos piezas para el forro de la misma medida. Yo en este caso he utilizado la misma tela tanto para el exterior como para el forro.
We cut two pieces of 30 x 35 cm, for outside fabric and another two pieces for the lining, with the same size. In this case, I used the same fabric for outside as for the lining


Cortamos 2 rectángulos de 30x15 cm para la parte superior de la bolsita
For the top part of the bag, we cut 2 rectangles of 30 x 15 cm.


HACEMOS LA APLICACIÓN
- Dibujar sobre la parte lisa del papel termo-adhesivo el dibujo a utilizar. Podeis descargaros el dibujo Aquí.
- Recortar dejando margen.
- Colocar la parte rugosa del papel termo-adhesivo sobre el revés de la tela y planchar (mantener 10 segundo la plancha sin vapor).


- On the smooth part of the fusible paper, we draw the picture that we want to use. Here you can download the picture.
- Cut the picture, leaving margin.
- Place the rough side of the fusible paper on the upside of the fabric and iron it (keep the iron            
  without steam for 10 seconds)


- Recortar por la linea dibujada
- Cut by the line draw


- Retirar el papel termo-adhesivo y colocar el dibujo sobre la tela que utilizaremos como exterior de la bolsita.
- Planchar manteniendo la plancha 10 segundos sin vapor.
- Remove the fusible paper and put the picture on top of the fabric that will be used as the outside of the bag.


- Hacer festón alrededor del dibujo. Yo esta vez lo hice a máquina pero puede ser perfectamente a mano.
- Colocar, si se quiere, los botones o adornos que queramos.
- Do around the picture the stitch that you prefer. I used the sewing machine, but it can be handmade.
- Put the buttons or decoration that you desire


MONTAR LA BOLSITA
- Colocar la tela trasera sobre la tela delantera, encarando los derechos  y coser todo alrededor, dejando sin coser la parte superior.
- Put the backside fabric on top of the front side fabric, facing the right side of each and sew all around, without sewing the upper side.


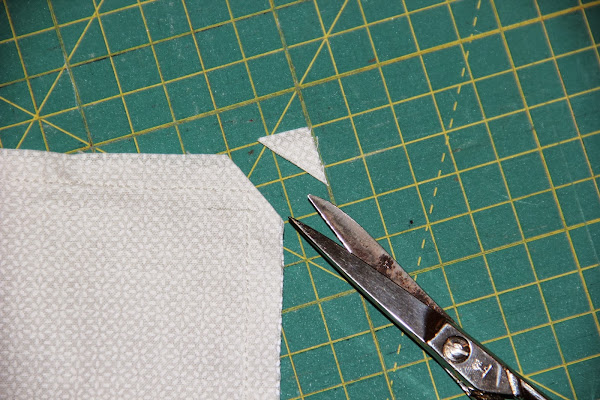
- Una vez cosido, cortar las esquinas y dar la vuelta a la bolsita.
- Once you sew it, cut the corners and turn over the bag.


- Y este sería el resultado.
- And this would be the result.


 - Ahora doblamos aproximadamente 1 cm, cada lado de los rectángulos de 30x15, tal y como se muestra en la imagen.
- Now we fold 1 cm approximately, each side of the 30 x 15 cm rectangles, as shown in the image.


- Cosemos.
- We sew.


- Doblamos a la mitad, planchamos y hacemos un pespunte por la mitad, tal y como indica la flecha.
- Fold in half, iron and do a backstitch on the half, as the arrow indicates.


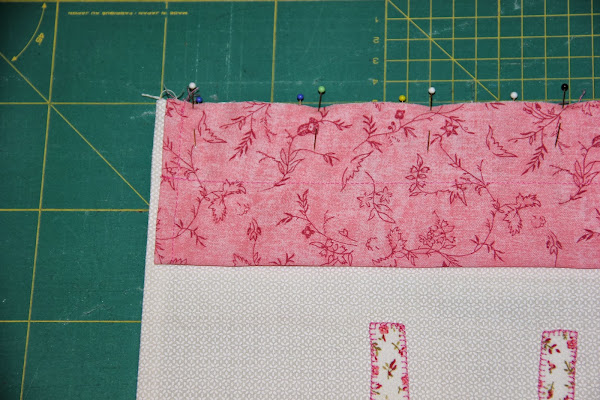
- Colocar los rectángulos en la parte superior de la bolsita, tal y como se muestra en la imagen. Uno por la parte delantera y otro por la parte trasera. Fijar con alfileres y reservar.
- Put the rectangles on the top side of the bag, as shown in the image. One on the frontside and the other on the backside. Set with pins and keep aside.


HACER EL FORRO
- Encarar lo derechos de los dos rectángulos destinados al forro.
- Fijar con alfileres.
- Coser dejando una abertura en la parte inferior de aproximadamente 10cm.
- Cortar el sobrante de las esquinas y NO dar la vuelta.
- Face the right side of the two rectangles of the lining.
- Set with pins
- Sew, leaving an open space of about 10 cm in the lower part.
- Cut the corners leftover, and don"t turn around.


- Meter la bolsita que habíamos reservado dentro del forro y fijar con las alfileres.
- Los rectángulos rosas que colocamos antes tendrían que quedar entre el exterior de la bolsita y el forro.
- Put the bag (the one we kept aside), inside the lining and set with pins.


- Cosemos
- We sew.


- Sacar la bolsita a través de la abertura del forro.
Take out the bag through the open space of the lining.


- Planchar tanto el forro como la parte exterior de la bolsita.
- Iron the lining and the outside part of the bag.


- Coser la abertura que hemos dejado del forro a puntada escondida.
- Meter el forro dentro de la bolsa.
- Sew the open space of the lining using a hidden stitch.
- Put the lining inside the bag
Ahora solo nos queda meter los cordones y habremos terminado nuestra bolsita
Now all we have to do, is put inside the cords, and our bag will be finished.


Puedes también ver el tutorial en el siguiente video a modo de presentación.

You can also see the tutorial in the next presentation video.


Que paseis un gran día

Have a great day

: )

Fuente: este post proviene de este blog, donde puedes consultar el contenido original.
¿Vulnera este post tus derechos? Pincha aquí.
Modificado:
¿Qué te ha parecido esta idea?

Esta idea proviene de:

Y estas son sus últimas ideas publicadas:

Hola a Tod@s ¡Que levante la mano el que no conozca todavía no tenga 6 ideas para reutilizar washi tape! Seguramente que pocos, no obstante, hoy me gustaría enseñaros 6 ideas para reutilizar washi tap ...

Hola a Tod@s Os muestro mi primer post colaborativo de Capazos para el verano. Aunque sé que no me va a dar tiempo a hacer 8 antes del 1 de Mayo, como me parece tan buena idea he decidido hacerlos igu ...

Hola a Tod@s Hoy me gustaría enseñaros un recopilatorio de un bolso playero para llevar nuestras cosas a la playa. Ya veréis cuantas cosas podemos hacer totalmente personalizadas y preciosas para luci ...

Recomendamos

Relacionado

costura diy handbox ...

Hola a Tod@s Hoy quiero enseñaros mi segundo tutorial de RECICLANDO UN VAQUERO. Esta vez he hecho un pequeño neceser para llevar lo más imprescindible dentro del bolso. Para hacerlo más divertido, lo adorné con parches de tela y así también le he dado un aire más juvenil. Hello everyone Today I will like to show you my second tutorial of RECYCLING JEANS. This time I made a small toilet-case to tak ...

NIÑOS aprende a coser auf einer Nähmaschine drehen ...

CONSEJOS – Los tejidos recomendados para hacer el vestido son: Viyela, sarga y franela. El forro es popelín. – Los patrones llevan costuras a un centímetro y bajos, son terminados. -Está de la talla 1 año a 10 años. -Dificultad: Media. TIPS – Recommended fabrics for the dress are: Viyella, twill and flannel. Lining is poplin. -The seam allowance and the hem are one centimeter (⅜ ...

costura bolsas (bags) diy ...

Hola a Tod@s Hace tiempo publiqué un tutorial de como hacer una bolsita para guardar la ropa interior femenina cuando nos vamos de viaje (para verlo podeis pinchar aquí). Bueno, pues ahora le ha tocado el turno a la bolsita para hombre. Ya hace tiempo que quería hacer este tutorial y ¡por fín! aquí está. Para hacerlo necesitamos: - 2 trozos de tela de 30x40 cm para el exterior. El tutorial lo hi ...

más manualidades bordado tutorial ...

Hola amigas, hoy quiero compartir con Uds. este lindo bolso que hice especialmente para guardar y transportar la tabla para cortar, las reglas para patchwork y alguna que otras cositas por el estilo, lo hice con Jean reciclado y como ya he comentado en entradas anteriores, a mi me encanta trabajar con Jean reciclado y crear de lo viejo algo nuevo y totalmente diferente. Hi, today I want to share ...

NIÑOS aprende a coser Burda style ...

CONSEJOS – Los tejidos recomendados para hacer el vestido son: Plumeti, popelín, batista y algodón. El forro es popelín. – En el consumo está incluida la braguita. – Dificultad: Media. TIPS – The recommended fabrics for the dress are swiss dot, poplin, batiste and cotton. The lining is poplin. -The amount of fabric specified includes the fabric needed for the diaper cover a ...

NIÑOS aprende a coser auf einer Nähmaschine drehen ...

CONSEJOS ÚTILES: Los tejidos recomendados son: Algodón, popelín y batista. Esta de la talla 6 meses a 6 años. Dificultad: fácil. VIDEO TUTORIAL MATERIALES: Género/fabric: 70 cm para talla/for sizes 6-9 meses/ month. 80 cm para tallas/for sizes 1- 2 años/ years. 90 cm para tallas/for sizes 3 – 4 años/ years. 1 m para tallas/for sizes 5 – 6 años/ years. Forro/lining: 60 cm para talla/fo ...

NIÑOS aprende a coser auf einer Nähmaschine drehen ...

CONSEJOS ÚTILES: – Los tejidos recomendados para hacer el vestido son: Algodón, popelin, batista y plumeti. La cantidad de tela necesaria se calcula según el género empleado para el modelo original en este caso el tejido es de 1,50 m de ancho. – Los patrones llevan costuras a un centímetro y bajos, son terminados. – Los dobladillos o bajos están marcados con piquetes. – Est ...

NIÑOS aprende a coser blog de costura ...

CONSEJOS – Los tejidos recomendados para hacer el abrigo son: Paño y muflón. El forro es de acetato. – Está en las tallas de 1 año a 7 años. – Dificultad: Alta. TIPS – Recommended fabrics for the coat are wool and mouflon. The lining is acetate. – Available in sizes 1 to 7 years. – Difficulty: High VIDEO TUTORIAL MATERIALES/MATERIALS Género cuadros/Checkered ...

costura diy neceser ...

Hola!! ¿Qué tal? Hace bastante que no publico, lo sé... Sorry!! Me fui unos días de viaje y estoy con algún encargo y además me estuve haciendo un vestido para una boda... y veía que llegaba la boda y estoy sin vestido! Pero llegó! Y quedó super chulo. Ya os enseñaré las fotos del vestido en otro post. Y también me ha salido trabajo nuevo.. en el Museo del Prado. Así que por eso no he podido publi ...

NIÑOS aprende a coser como hacer ropa ...

CONSEJOS – Los tejidos recomendados para hacer el vestido son: Viyela, algodón, sarga y lana fina. El forro es popelín. – Los patrones llevan costuras a un centímetro y bajos, son terminados. – Está en las tallas de 3 años a 12 años. – Dificultad: Media. TIPS – Recommended fabrics for the dress are: Viyella, cotton, twill and fine wool. The lining is poplin. -The seam ...