Encara que és un mini àlbum molt senzill de fer us hem preparat un tutorial per explicar-vos les passes per fer la base. El material que necessitem és: paper decorat de 30’5cmX15’25cm (Creative agenda by Kaitlin Sheaffer d’Echo park paper co), és a dir, la meitat d’un full d’scrapbook, i un altre rectangle de 25’5cmX10’5cm amb un estampat diferent (Las Lunálicas de Sra.Granger); amb cartró reciclat hem retallat dos rectangles de 11cmX12cm i un altre rectangle de 11cmX2cm per fer les tapes i el llom; per les pàgines i la butxaca hem fet servir cartolina blanca: un rectangle de 11cmX9cm, tres rectangles de 10cmX9cm i per la butxaca, que plegada fa 10’5cmX8cm, necessitem un rectangle de 11’5cmX9cm.
Comencem el tutorial. Retallem el paper d’scrapbook per muntar les tapes (1); per la part interior, que no es veurà, marquem amb llapis 2cm per tot el voltant (2); col·loquem i enganxem les tapes i el llom, que hem tallat amb cartró reciclat, dins d’aquest rectangle que hem dibuixat procurant que quedi un petit marge entre el llom i les tapes per poder fer el plec (3). Retallem les puntes del paper a mil·límetres de les tapes (4), posem cel·lo de doble cara tan a les tapes com al paper (5) i comencem a enganxar les parts més llargues (6) i acabem enganxant les parts dels costats (7). Nosaltres per tancar el mini àlbum hem incorporat un cordill, que hem enganxat abans de posar el folre interior (8); enganxem i marquem els plecs del llom (9). Pleguem (10) i obrim per començar a col·locar les pàgines (11).
Com a base de les pàgines, que treballarem en forma de cascada, fem servir cartolina blanca (12). Farem només tres pàgines; a la part superior de cada una marcarem un plec d’1cm (13), que plegarem (14). Enganxem les pàgines a la base: la primera, just al marge de la base, amb el plec cap a dins; la segona just sota del plec de la primera i la tercera just sota del plec de la segona (15) i ja tenim les pàgines muntades (16) i preparades per enganxar al mini àlbum (17). Preparem la butxaca que anirà al altre costat del mini àlbum i marquem els plecs a 1cm i retallem les puntes per poder doblegar bé (18); enganxem (19) i ja el tenim a punt per decorar com vulguem (20).
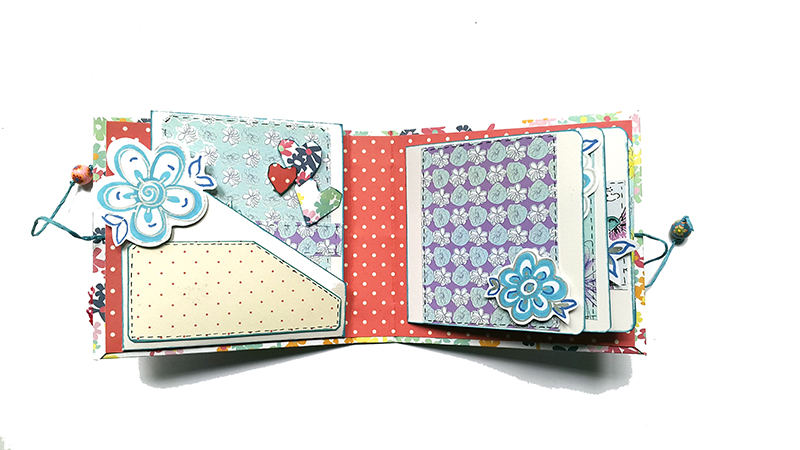
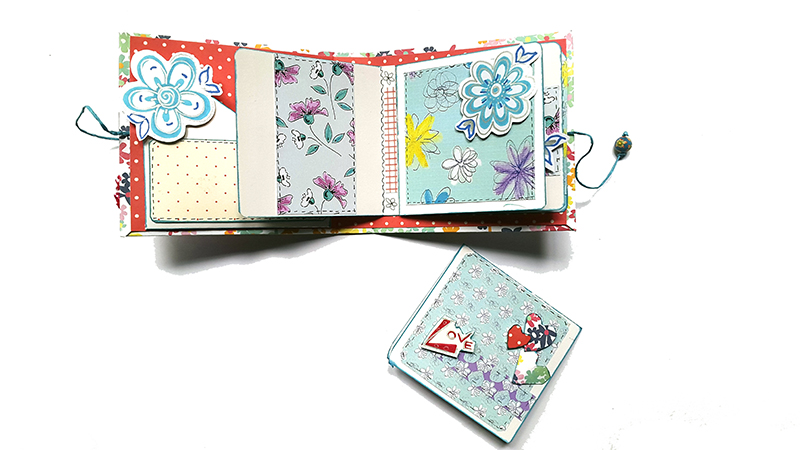
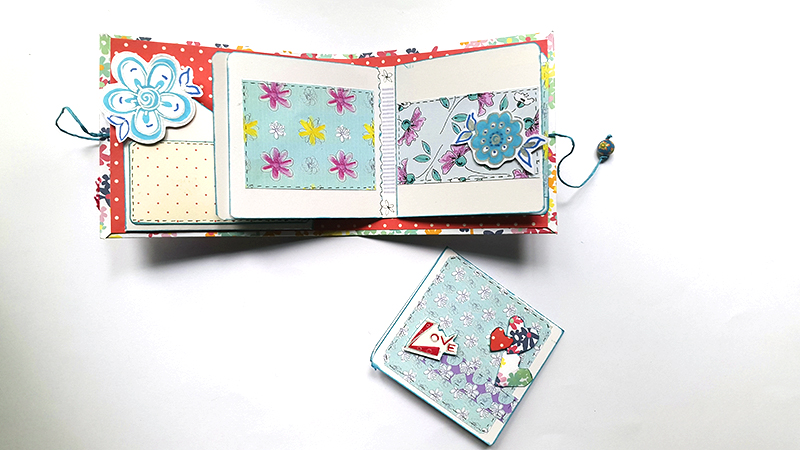
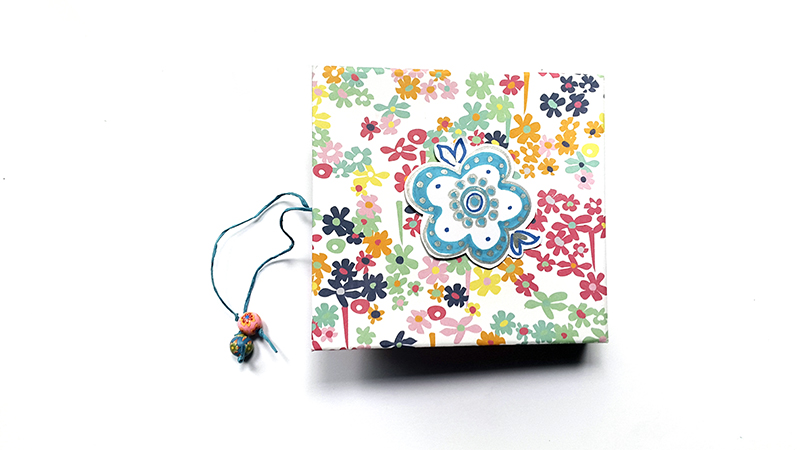
Com us hem dit abans, nosaltres hem fet servir els nostres propis dissenys de paper per fer les decoracions interiors; també hem dissenyat, nosaltres mateixes, les flors de decoració i les lletres de la portada. Hem inclòs una petita tarja a conjunt amb el mini àlbum.
Desitgem que us hagi agradat i que el nostre tutorial us faci servei.
L’ALEGRE SUAVITAT DELS COLORS FRESCOS!!!
MINI ÁLBUM FRESH: TUTORIAL DE SCRAPBOOK.
El mini álbum que os presentamos hoy Les Antònies es una combinación de papel de scrapbookdecorado de compra y de nuestros propios diseños. Hemos jugado con los estampados florales y los colores claros para dar un aire muy fresco y juvenil.
Aunque es un mini álbum muy sencillo de hacer os hemos preparado un tutorial para explicaros los pasos para hacer la base. El material que necesitamos es: papel decorado de 30’5cmX15’25cm (Creative agenda by Kaitlin Sheaffer de Echo park paper co), es decir, la mitad de una hoja de scrapbook, y otro rectángulo de 25’5cmX10’5cm con un estampado diferente (Las Lunálicas de Sra.Granger); con cartón reciclado hemos recortado dos rectángulos de 11cmX12cm y otro rectángulo de 11cmX2cm para hacer las tapas y el lomo; para las pagines y el bolsillo hemos usado cartulina blanca: un rectángulo de 11cmX9cm, tres rectángulos de 10cmX9cm y para el bolsillo, que plegado hace 10’5cmX8cm, necesitamos un rectángulo de 11’5cmX9cm.
Comencemos el tutorial. Recortamos el paper de scrapbook para montar las tapas (1); para la parte interior, que no se verá, marcamos con lápiz 2cm por todo alrededor (2); colocamos y pegamos las tapas y el lomo, que hemos cortado en cartón reciclado, dentro de este rectángulo que hemos dibujado procurando que quede un pequeño margen entre el lomo y las tapas para poder hacer el pliegue (3). Recortamos las puntas del paper a milímetros de las tapas (4), ponemos celo de doble cara tanto en les tapas como en el papel (5) y comenzamos a pegar las partes más largas (6) y acabamos pegando las partes de los costados (7). Nosotras para cerrar el mini álbum hemos incorporado un cordón, que hemos pegado antes de poner el forro interior (8); pegamos y marcamos los pliegues del lomo (9). Plegamos (10) y abrimos para empezar a colocar las páginas (11).
Como base de las páginas, que trabajaremos en forma de cascada, usaremos cartulina blanca (12). Haremos solo tres páginas; en la parte superior de cada una marcaremos un pliegue de 1cm (13), que plegaremos (14). Pegamos las páginas a la base: la primera, justo en el margen de la base, con el pliegue hacia dentro; la segunda justo debajo del pliegue de la primera y la tercera justo debajo del pliegue de la segunda (15) y ya tenemos las páginas montadas (16) y preparadas para pegar al mini álbum (17). Preparamos el bolsillo que irá al otro lado del mini álbum y marcamos los pliegues a 1cm y recortamos las puntas para poder plegar bien (18); pegamos (19) y ya lo tenemos a punto para decorar como queramos (20).
Como os hemos dicho antes, nosotras hemos usado nuestros propios diseños de papel para hacer las decoraciones interiores; también hemos diseñado, nosotras mismas, las flores de decoración y las letras de la portada. Hemos incluido una pequeña tarjeta a conjunto con el mini álbum.
Deseamos que os haya gustado y que nuestro tutorial os sea útil.
¡¡¡LA ALEGRE SUAVIDAD DE LOS COLORES FRESCOS!!!
MINI ALBUM "FRESH": SCRAPBOOK TUTORIAL.
The mini album that Les Antònies are presenting today is a combination of purchase decorated scrapbook paper and of our own designs. We played with floral prints and bright colors to give a fresh and youthful air.
Although its a mini album very easy to make we have prepared a tutorial to tell you the steps to make the base. The material you need is: decorated paper of 305cmX1525cm (Creative agenda by Kaitlin Sheaffer from Echo park paper co), that is to say, the half of a sheet of scrapbook, and another rectangle of 255cmX105cm with a different print (Las Lunálicas of Sra.Granger); with recycled cardboard we cut out two rectangles of 11cmX12cm and another 11cmX2cm rectangle to make the covers and the spine; for the pages and the pocket we used white cardboard paper: a rectangle of 11cmX9cm, three rectangles of 10cmX9cm and to the pocket, which makes folded 105cmX8cm, we need a rectangle of 115cmX9cm.
We start the tutorial. We cut the scrapbook paper to mount the covers (1); for the inside, it will not be seen, mark with pencil 2 cm all around (2); place and attach the covers and the spine, that weve cut with recycled cardboard, inside this rectangle weve drawn making sure that left a small margin between the spine and the covers to make the crease (3). Cut the tips of the paper in millimeters of the covers (4), put double sided tape as in the covers as in the paper (5) and we start to glue the longer parts (6) and we ended up sticking the parts of the sides (7). To close the mini album we have incorporated a cord, we hooked before we put the inside cover (8); attach and mark the pleats in the back (9). We pleat it (10) and open to start putting the pages (11).
As the basis of the pages, which we will work in the form of a waterfall, we will use white cardboard (12). We’ve got only three pages; at the top of each mark a crease of 1cm (13), that we pleat it (14). We stick the pages to the base: the first, just on the edge of the base, with the fold inward; the second just below the crease of the first and the third just under the fold of the second (15) and we have assembled the pages (16) and ready to paste into the minialbum (17). We prepare the pocket that will go to the other side of the mini album and mark the folds to 1 cm and cut the ends to be able to fold well (18); Paste (19) and have it ready to decorate as you want (20).
As we have said before, we have used our own paper designs to make interior decorations; also we have designed ourselves the decoration flowers and letters on the cover. We have included a small card to set with the mini album.
We hope that you liked it and that our tutorialis useful to you.
THE CHEERFUL SOFTNESS OF FRESH COLORS!!!


